No-drill fixes • Updated Apr 20, 2026 • 18 min read
Drafty windows: 7 reversible fixes (no drilling)
 By Michael Rivera · Updated Apr 20, 2026
Every December I'd get the same wave of work orders: “My apartment is freezing, the heat doesn't work.” Nine times out of ten, the heat was fine—the windows were leaking cold air faster than the system could keep up. The good news is that most drafts come from a handful of predictable gaps around the sash, frame, or latch, and you can fix nearly all of them with materials that peel off when you leave.
Everything here uses removable materials only—no drilling, no permanent caulk. If your lease restricts modifications or you find anything involving wiring or structural damage, stop and contact your maintenance team instead.
Tools & supplies
- Tissue (airflow detection)
- Painter’s tape (mark leaks)
- Microfiber cloth (clean surfaces before applying tape/foam)
- Scissors or utility knife (for cutting strips)
- Optional: hairdryer (helps remove adhesive cleanly later)
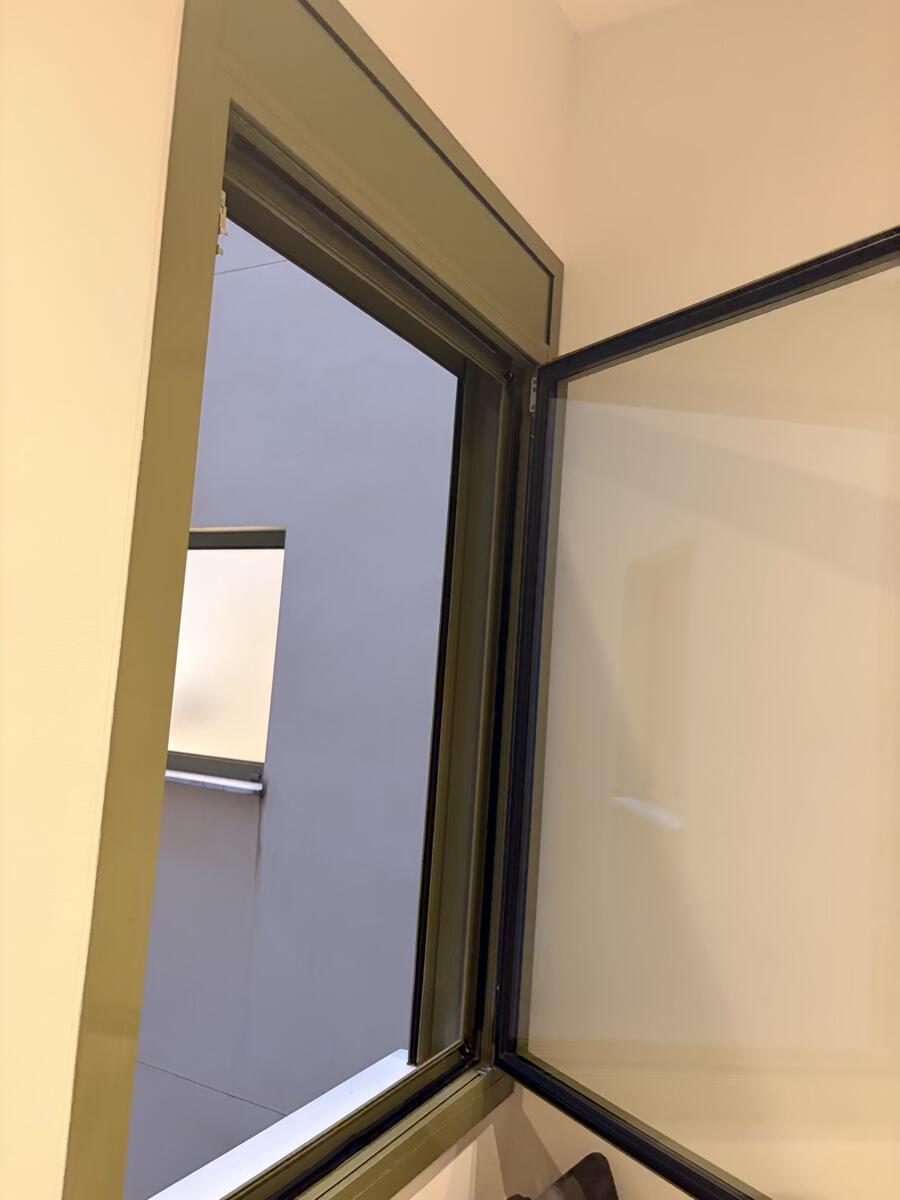
Before you start: find the leak
One trick I picked up from a tenant who happened to be an architect: before testing with a tissue, turn off the HVAC so the air pressure inside is neutral. Otherwise your furnace can push air against the windows and mask the real leak paths. She found three gaps I'd missed during my own inspection.
- On a windy day, hold a tissue near edges to spot airflow.
- Use painter's tape to mark the exact gap locations.
- If you see condensation between double panes, that's a failed seal—report it to maintenance.
Quick diagnosis (what kind of draft is it?)
| Draft location | Often means | Best first fix |
|---|---|---|
| Along the sides where the sash slides | Worn weatherstripping | V-seal / foam strip |
| Bottom sill | Gap at sill | Draft stopper / rope caulk (seasonal) |
| Latch area | Poor seal at lock | Foam strip near latch |
| Cold outlet near window | Air leak around box | Outlet gasket (low-risk) |
7 renter-friendly fixes (detailed)
Each fix below includes step-by-step instructions, estimated cost, and a deposit-risk rating so you can pick what fits your situation. I’ve ranked them from simplest to most involved.
Fix 1: Fabric draft stopper (sill gaps)
Cost: $5–$15 | Deposit risk: None | Best for: bottom-of-window gaps and under doors
These are fabric tubes filled with foam or sand that sit against the sill. No adhesive, no installation—just place and done. I keep a stack of these in my maintenance van because they’re the one fix I can recommend to any tenant without worrying about lease terms.
- Measure the width of your window sill (or door bottom).
- Buy a stopper that’s slightly longer than the opening—you can trim fabric ones with scissors.
- Place it snugly against the gap. For sills, tuck it between the sash and the frame.
- If the stopper slides, a small piece of non-slip shelf liner underneath keeps it in place.
Limitation: draft stoppers only block gaps at the bottom. If air is coming in from the sides or top, you’ll need one of the other fixes below.
Fix 2: Thermal curtains with tension rods
Cost: $20–$40 per window | Deposit risk: None (with tension rods) | Best for: large cold glass surfaces, single-pane windows
Thermal curtains have an insulating backing that creates a dead-air buffer between the cold glass and your room. The trick most people miss: the curtain needs to seal at the top and sides, or warm room air circulates behind it and you lose most of the benefit.
- Get a tension rod (the spring-loaded kind)—no drilling, no screws. Mount it inside the window frame or just above.
- Choose curtains that are wider than the window by at least 6 inches total (3 inches overlap per side).
- Hang them so the bottom just touches the sill or floor. Any gap at the bottom lets cold air pool.
- For extra sealing, use small magnetic clips or Velcro strips at the edges to hold the curtain against the wall. These peel off cleanly at move-out.
I had a tenant in a 1960s building with original single-pane windows who dropped her heating bill by nearly 20% after hanging thermal curtains in the bedroom and living room. Not scientific, but the thermostat stopped cycling as often—that’s real.
Fix 3: Adhesive foam weatherstripping (frame gaps)
Cost: $4–$10 per roll | Deposit risk: Low (if you choose removable adhesive) | Best for: consistent gaps along the frame where the sash meets the stop
- Clean the frame surface with a damp microfiber cloth. Let it dry completely—adhesive won’t stick to dust or moisture.
- Measure the length you need and cut the strip. Don’t stretch it during application.
- Peel the backing and press the strip firmly into the gap, starting at one corner and working along.
- Close the window to check that the sash still latches. If it won’t close, the foam is too thick—switch to a thinner profile.
- Open and close the window a few times to seat the foam.
Key detail: look for foam labeled "removable" or "temporary." Standard weatherstripping adhesive can bond permanently after a few months, especially on painted wood. When in doubt, do a patch test on a hidden spot (inside the track, not the visible frame).
Fix 4: V-seal / tension seal (sliding edges)
Cost: $5–$12 per roll | Deposit risk: Low | Best for: the sides of double-hung windows where the sash slides up and down
V-seal is a folded strip (usually plastic or metal) that springs open to fill a gap. It’s one of the more effective solutions for sliding windows because it compresses when the sash moves and springs back when it’s closed.
- Open the window fully. Clean the channel where the sash slides.
- Cut the V-seal to the length of the channel.
- For adhesive-backed V-seal: peel and stick along the channel with the open side of the V facing the outside.
- For nail-in V-seal (metal): skip this in a rental—it leaves holes. Stick to adhesive versions.
- Close the window and check that it slides freely. The seal should compress, not jam.
Fix 5: Clear shrink film kit (old leaky windows)
Cost: $8–$20 (covers 2–5 windows) | Deposit risk: Low–Medium (tape can lift paint) | Best for: old, single-pane, or poorly sealed windows where multiple gaps exist
Shrink film kits are the nuclear option for drafty windows. You tape a sheet of plastic over the entire window frame and then shrink it tight with a hairdryer. It creates an insulating air pocket and seals every gap at once. The downside: you can’t open the window until you remove the film.
- Clean the frame thoroughly—the double-sided tape needs a clean surface.
- Patch test the tape on a hidden corner of the frame. Apply, wait 24 hours, then peel slowly. If paint comes with it, this method isn’t safe for your frames.
- Apply the double-sided tape around the entire frame perimeter.
- Unroll the film and press it onto the tape, leaving some slack.
- Use a hairdryer on medium heat, moving slowly across the film. It will shrink taut and become nearly invisible.
- Trim excess film with a utility knife.
Removal: go slow. Heat the tape with a hairdryer first, then peel at a shallow angle. If you feel resistance, stop and apply more heat. Rushing this step is how paint gets damaged.
Fix 6: Rope caulk (seasonal sealing)
Cost: $3–$7 per roll | Deposit risk: Low | Best for: irregular gaps that foam strips can’t cover, or as a temporary seasonal seal
Rope caulk is a putty-like strip that you press into gaps by hand. It stays pliable, doesn’t harden like regular caulk, and peels off cleanly in spring. I’ve used it on hundreds of units as a quick winter patch.
- Make sure the surface is dry and clean.
- Unroll a length of rope caulk and press it into the gap with your fingers. It molds to irregular shapes, which is its main advantage over foam strips.
- For wide gaps, double up or braid two strips together.
- When the season ends, peel it off. If it leaves a slight residue, warm soapy water takes care of it.
Avoid using rope caulk on: porous unsealed wood (it can leave an oily stain) or surfaces you’ve just painted (give fresh paint at least 30 days to cure).
Fix 7: Outlet gaskets (cold outlets near windows)
Cost: $2–$5 for a pack | Deposit risk: None | Best for: electrical outlets on exterior walls that feel cold or drafty
This one surprises people. Electrical outlets on exterior walls often have gaps behind the cover plate where air leaks through the wall cavity. A foam gasket behind the plate can make a noticeable difference.
- Turn off the breaker for that outlet. Use a phone charger or lamp to confirm the power is off.
- Remove the cover plate (one or two screws).
- Place the foam gasket over the outlet, aligning the holes.
- Replace the cover plate. Done.
If you’re not comfortable working near outlets, skip this one and ask maintenance. It’s low-risk, but anything electrical deserves caution.
Cost comparison at a glance
| Fix | Cost | Deposit risk | Effectiveness | Can open window? |
|---|---|---|---|---|
| Draft stopper | $5–$15 | None | Low (bottom only) | Yes |
| Thermal curtains | $20–$40 | None | Medium–High | Yes |
| Foam weatherstripping | $4–$10 | Low | Medium | Yes |
| V-seal | $5–$12 | Low | Medium–High | Yes |
| Shrink film | $8–$20 | Low–Med | High | No |
| Rope caulk | $3–$7 | Low | Medium | No |
| Outlet gaskets | $2–$5 | None | Low | N/A |
For most renters, I recommend starting with draft stoppers + thermal curtains (zero deposit risk), then adding foam weatherstripping or V-seal if you still feel air coming through.
Seasonal timing: when to apply and when to remove
Timing matters more than most people think. Apply too early and you live with sealed windows through a warm October. Apply too late and you’ve already been overpaying on heating for a month.
- Apply when nighttime temperatures consistently drop below 45°F (7°C)—usually late October or early November in most of the U.S.
- Remove adhesive-based fixes (foam, V-seal, shrink film) when overnight lows stay above 50°F. The longer adhesive sits, the harder it is to remove cleanly.
- Year-round: draft stoppers and thermal curtains can stay up all year. Curtains double as blackout shades in summer.
General application tips
- Clean first: adhesive sticks poorly to dusty or greasy frames. A damp microfiber cloth and 30 seconds of drying makes a real difference.
- Test a small piece: some paint lifts easily—better to find out in a hidden spot than across the whole frame.
- Don’t over-thicken: too much foam can prevent the window from closing fully, which actually makes the draft worse.
- Work one window at a time: finish and test each window before moving on. That way you know exactly what worked and what didn’t.
Removal tips (protect your deposit)
- Go slow: fast pulling is what lifts paint. Peel at a shallow angle, not straight up.
- Use warmth: a hairdryer on medium heat softens adhesive for much cleaner removal. Hold it 4–6 inches from the surface and move slowly.
- Clean residue gently: warm soapy water first. If that doesn’t work, try a small amount of rubbing alcohol on a cotton pad—but patch test on a hidden area first.
- Document removal: take before and after photos of each window. If there’s minor paint damage, note it and let your landlord know proactively. Being upfront usually goes better than surprises at walkthrough.
What to avoid in rentals
- Permanent caulk unless your lease explicitly allows it.
- Spray foam around windows (messy, permanent, can damage frames).
- Super-strong adhesives that tear paint on removal.
Stop signs (call maintenance)
- Condensation between panes (failed seal).
- Window won’t latch or feels unsafe (security/egress issue).
- Rotten wood, soft framing, or water intrusion.
Move-out cleanup
Take photos before and after. Remove adhesives slowly. For residue, try warm soapy water first, then a small patch test with a gentle adhesive remover.
FAQ
- Do draft fixes help with mold? Indirectly, yes. Drafty windows create cold surfaces where warm indoor air condenses, and that moisture feeds mold. Sealing drafts keeps the glass and frame warmer, which reduces condensation. For a deeper dive, see mold prevention for renters.
- Are shrink film kits safe for rentals? Generally yes, but the double-sided tape can lift paint on certain finishes. Always patch test on a hidden spot, wait 24 hours, and peel slowly. If paint comes off during the test, skip this method and use thermal curtains instead.
- What’s the least risky option for my deposit? Draft stoppers and thermal curtains use zero adhesive and leave zero marks. They’re always safe, regardless of your lease terms.
- Can I use permanent caulk if the gap is really bad? Only if your lease explicitly allows it, and even then, I’d recommend getting written permission from your landlord first. In most cases, rope caulk (removable) does the same job without any risk to your deposit.
- How do I know if the draft is coming from the window or the wall? Hold a tissue along the window frame edge. If it flutters, the leak is at the window. Then check any electrical outlets on the same wall—if the tissue flutters there too, air is leaking through the wall cavity, and an outlet gasket is the fix.
- Will my landlord reimburse me for weatherstripping materials? Some will, some won’t. It’s worth asking, especially if the draft is bad enough to affect heating costs. Frame it as "I bought $12 in removable weatherstripping to reduce the heating load until a permanent fix is scheduled."
- How much can these fixes actually save on heating? It depends on how leaky your windows are, but the U.S. Department of Energy estimates that air leaks account for 25–30% of heating energy use in typical homes. Even sealing a few major gaps can make a noticeable difference in comfort and thermostat cycling.
Was this guide helpful? Have a correction or tip to add? Email [email protected].
Renter for 15+ years. I write practical, landlord-safe fixes I've actually done in my own apartments — no permits, no drama, deposit intact. More about me →